Have you been scouring the internet looking for free, easy, quick ways to get captions or subtitles into your videos? Look no further!
This post will show you how to get subtitles into any video, for free, using YouTube. After doing this method, you can then upload your video natively to any other platform like Instagram or LinkedIn and it will have its captions (not just copying or embedding the YouTube video).
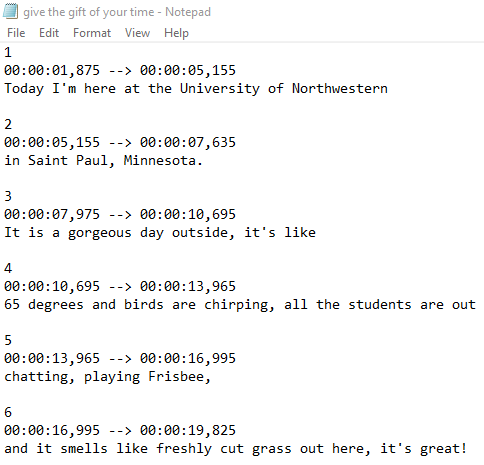
The biggest thing you are looking for is creating an SRT file, otherwise known as a SubRip Subtitle file. It’s a text file formatted a special way for subtitles. Once you have the SRT file for your video, you can upload your video and the SRT file to other platforms to get your subtitles/captions into your videos.
The only tool you need to make this SRT file is YouTube, and it’s FREE! I’ll show you how to do it below. Eventually you’ll end up with a video that has subtitles like this one.
Step 1 – Upload your video to YouTube.
Step 2 – Find your video by clicking your icon in the top-right corner and clicking “My Channel.” Once your video is open, click the “Edit Video” button.

Step 3 – On the left navigation, choose the tab “Transcriptions”
Step 4 – On the far right under the column “Subtitles,” hit the button for your language.

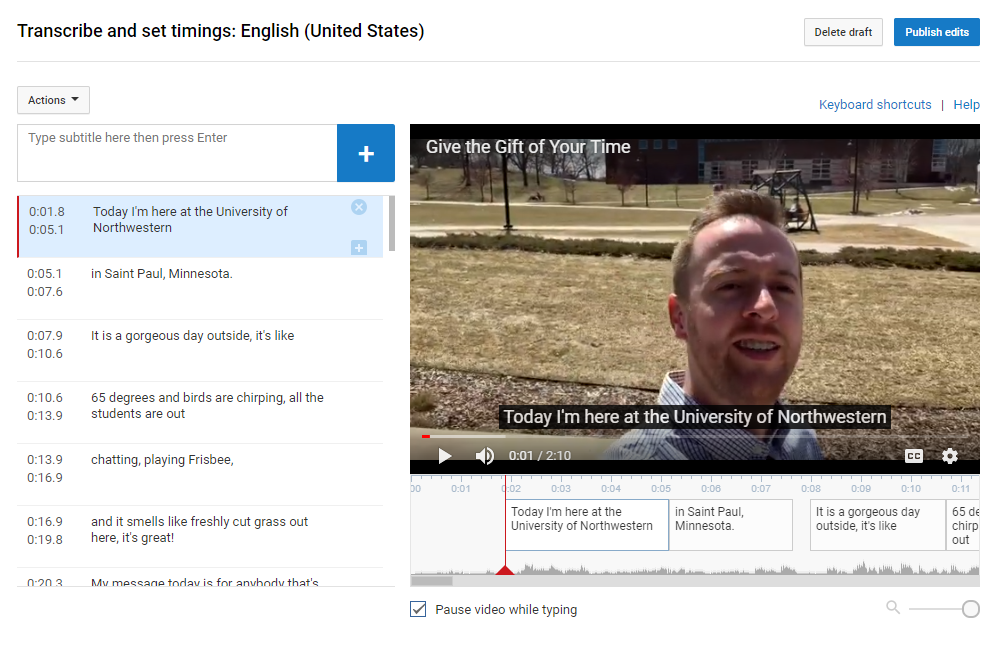
Step 5 – Now you should be on a screen that looks like this (except my subtitles are already entered in, yours will be blank). This is where you can easily enter all of your subtitles. YouTube makes it pretty intuitive. I found it’s easiest and quickest to just manually enter them the exact way you want. When finished, hit the “Publish edits” button.
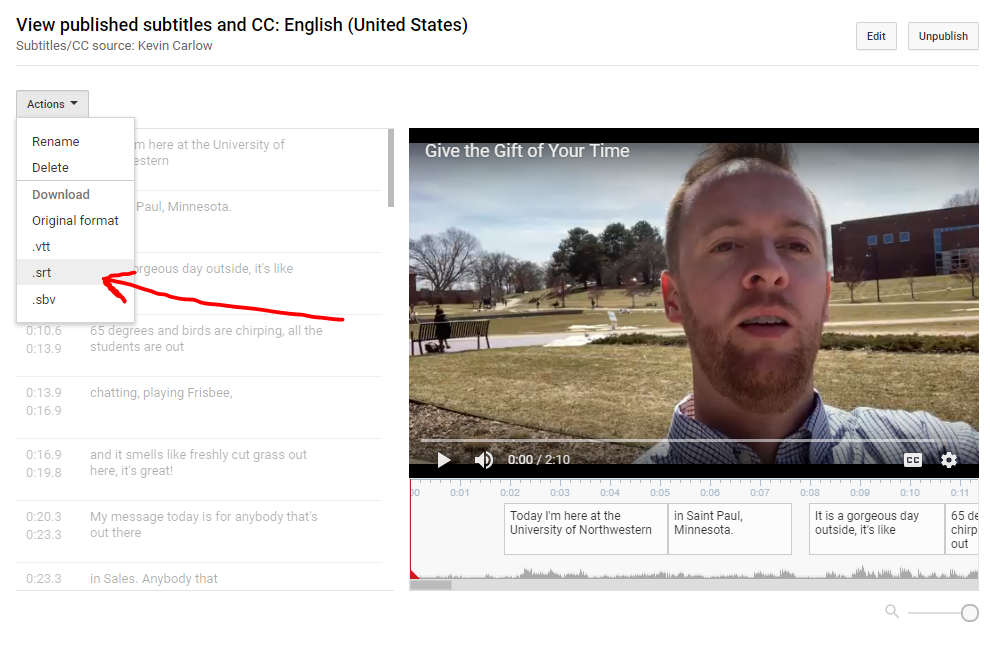
Step 6 – Now that all your subtitles are entered in and you’ve published the edits, get back to the Transcription screen for your video and click the “Actions” drop-down in the top-left of the screen. Choose “Download .srt”
Step 7 – Congratulations, your YouTube video now has subtitles! If you are curious to see what an SRT file looks like, open up the file you just created with any word processor program, like Notepad. It should look something like this.
Step 8 – Now you want to get this video onto another platform with its subtitles, like LinkedIn, but you don’t want to just copy and paste the YouTube video, you want to upload directly to LinkedIn. Here’s how. Go to your LinkedIn Home screen and click the Video button at the top.

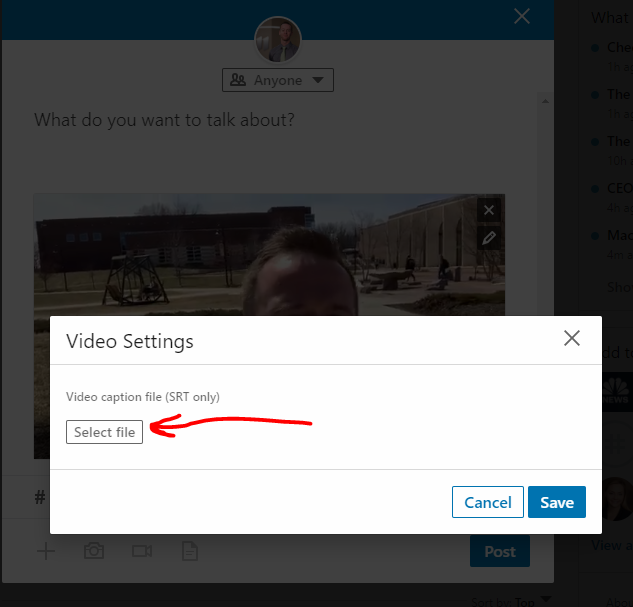
Step 9 – Find your video file and upload it. Now you’re brought to a screen where you can edit your post. Hover over the video and click the Pencil icon to edit the video.
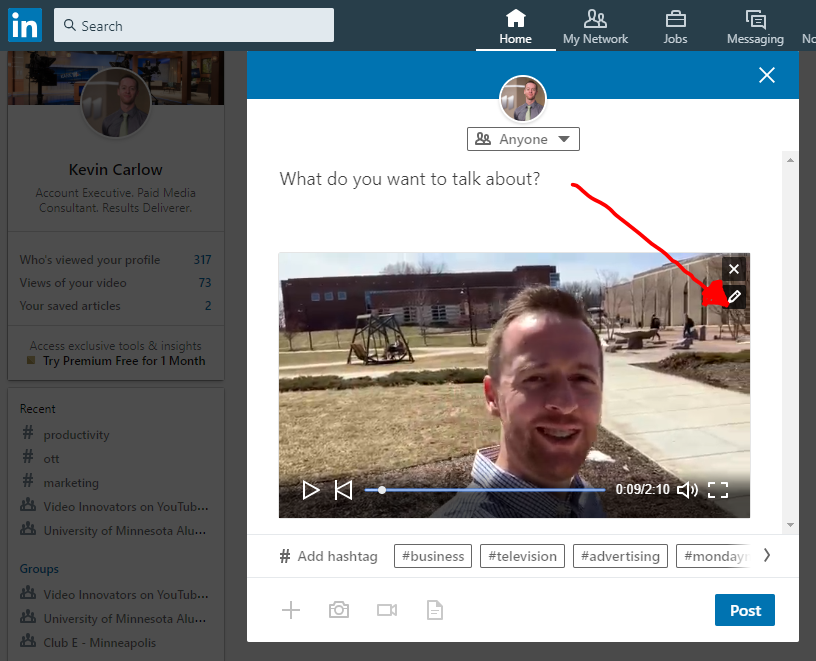
Step 10 – Find your SRT file and upload it.
Step 11– Finish up your post by writing a brief comment about your video and BOOM – you’re done! Now your video is on LinkedIn, with subtitles, for free.
Did you get any value from this article? Let me know if something tripped you up or if this was a saving grace. I’d love to hear your feedback!